whirlpool dryer repair manual pdf
Welcome to the Whirlpool Dryer Repair Manual PDF, your comprehensive guide for troubleshooting, maintaining, and repairing your dryer. Designed for both new and experienced users, this manual provides detailed instructions to ensure safety, efficiency, and optimal performance.
1.1. Purpose of the Manual
The Whirlpool Dryer Repair Manual PDF is designed to empower users with the knowledge and confidence to troubleshoot, maintain, and repair their dryers effectively. This guide serves as a comprehensive resource, offering detailed instructions and practical advice to address common issues, ensuring optimal performance and longevity of the appliance. Whether you’re a novice or an experienced user, this manual provides clear, step-by-step guidance to help you resolve problems efficiently and safely. By following the instructions, you can avoid costly repairs, extend the lifespan of your dryer, and ensure it operates at its best. This manual is your go-to reference for understanding your dryer’s mechanics, diagnosing faults, and performing repairs with precision.
1.2. Importance of Following the Guide
Following the Whirlpool Dryer Repair Manual PDF is crucial for ensuring safety, effectiveness, and cost-efficiency. The guide provides clear instructions that help users diagnose and resolve issues without causing further damage. By adhering to the manual, you can prevent accidents, avoid voiding warranties, and ensure repairs are performed correctly. Proper adherence also helps maintain the dryer’s efficiency, reducing energy consumption and extending its lifespan. Additionally, following the guide minimizes the risk of costly mistakes, making it a vital resource for both DIY enthusiasts and professionals. Compliance with the manual’s recommendations ensures optimal performance and reliability, keeping your dryer in excellent working condition for years to come.
1.3. Safety Precautions
Before attempting any repairs, it is essential to follow the safety precautions outlined in the Whirlpool Dryer Repair Manual PDF. Always disconnect the power supply to avoid electrical shocks or injuries. Wear appropriate protective gear, including gloves and safety glasses, to protect yourself from sharp edges or debris. Never attempt to dismantle or modify the dryer without proper guidance, as this can lead to serious hazards. Ensure the area is well-ventilated and free from flammable materials. Additionally, keep children and pets away during the repair process. By adhering to these precautions, you can ensure a safe and successful repair experience. Remember, safety should always be your top priority when working with electrical appliances.
Safety Guidelines for Repair
Ensure your safety by disconnecting power, wearing protective gear, and avoiding improper repairs. Always follow the manual’s instructions to prevent accidents and ensure proper ventilation during repairs.
2.1. Essential Safety Tips
When performing repairs, always prioritize safety to avoid injuries and damage. Disconnect the power supply before starting any work to eliminate the risk of electric shock or accidental start-ups. Wear protective gear, including gloves and safety glasses, to protect yourself from sharp edges and debris. Ensure proper ventilation in the workspace to prevent inhaling dust or fumes. Never bypass safety features or ignore warning labels, as this can lead to serious accidents. Keep children and pets away from the repair area. Use only authorized tools and follow the manual’s instructions carefully. Properly ground the appliance and avoid overloading circuits. Regularly inspect cords and plugs for damage before use. Remember, safety is paramount to ensure successful and incident-free repairs;
2.2. Protective Gear and Tools
Protective gear and the right tools are crucial for safe and effective dryer repairs. Always wear safety glasses and gloves to protect yourself from sharp edges and electrical components. A dust mask is recommended when handling lint or debris. Essential tools include a screwdriver set, pliers, and a wrench for dismantling and reassembling parts. A multimeter is useful for diagnosing electrical issues. Ensure all tools are in good condition to prevent accidents. Additionally, keep a work light handy for better visibility. Organize your tools beforehand to streamline the repair process. Using the correct tools and gear not only enhances safety but also ensures efficient troubleshooting and maintenance of your Whirlpool dryer.
2.3. Disconnecting Power Supply
Disconnecting the power supply is the first and most critical step in any dryer repair. Always switch off the dryer and unplug it from the electrical outlet to ensure your safety. Verify that the power is completely off using a multimeter to check for any residual voltage. Never attempt repairs while the dryer is connected to a power source, as this poses a significant risk of electric shock or injury. If you are unsure about how to safely disconnect the power, consult a licensed electrician or refer to your local electrical safety guidelines. This precaution is non-negotiable to protect yourself and ensure a safe working environment for repairs.
Tools and Equipment Needed
Essential tools include screwdrivers, pliers, wrenches, and a multimeter. Specialized tools like a belt replacement kit may be required for specific repairs. Ensure all tools are readily available before starting any task to avoid delays. Safety gear and proper equipment are crucial for effective and safe dryer maintenance and repair. Always refer to the manual for specific tool recommendations to guarantee compatibility and ease of use.
3.1. Basic Tools for Dryer Repair
The basic tools needed for dryer repair include a screwdriver set, pliers, wrenches, and a multimeter. These tools are essential for disassembling and diagnosing common issues. A flathead screwdriver is often used to remove panels, while pliers help with gripping small parts. Wrenches are necessary for loosening bolts, and a multimeter aids in checking electrical connections. Additionally, a Torx driver may be required for specific models. Always ensure tools are in good condition to avoid damaging the appliance. Proper tool usage is vital for safe and effective repairs, as outlined in the Whirlpool dryer repair manual PDF. Keep all tools organized and within reach to streamline the repair process.
3.2. Specialized Tools for Advanced Fixes
For advanced dryer repairs, specialized tools are often required to address complex issues. These include a circuit board tester, thermal sensor multimeter, and belt tension gauge. A circuit board tester helps diagnose electrical faults, while a thermal sensor multimeter ensures accurate temperature readings. A belt tension gauge is essential for proper belt alignment and tension adjustment. Additionally, a drum removal tool may be needed for accessing internal components. These tools are typically not part of a basic toolkit and are designed for precise diagnostics and repairs. They are widely available at authorized Whirlpool service centers or online retailers. Using the correct specialized tools ensures efficient and safe repairs, as detailed in the Whirlpool dryer repair manual PDF.
3.3. Where to Source Spare Parts
To ensure your Whirlpool dryer repair is successful, it’s crucial to source genuine spare parts. These can be purchased from authorized Whirlpool service centers, online retailers, or directly through Whirlpool’s official website. Always verify the authenticity of parts to maintain safety and performance. The Whirlpool dryer repair manual PDF often includes part numbers and diagrams to help identify what you need. Additionally, contacting Whirlpool support or visiting their website can provide direct links to authorized sellers. Using genuine parts ensures compatibility and longevity, avoiding potential risks from non-genuine components. For convenience, many online platforms offer fast shipping and competitive pricing for Whirlpool dryer spare parts. Always consult the manual for specific part recommendations before making a purchase.
Troubleshooting Common Issues
This section helps identify and resolve common Whirlpool dryer problems, such as non-operation, heating issues, or unusual noises, using diagnostic guides and fault codes.
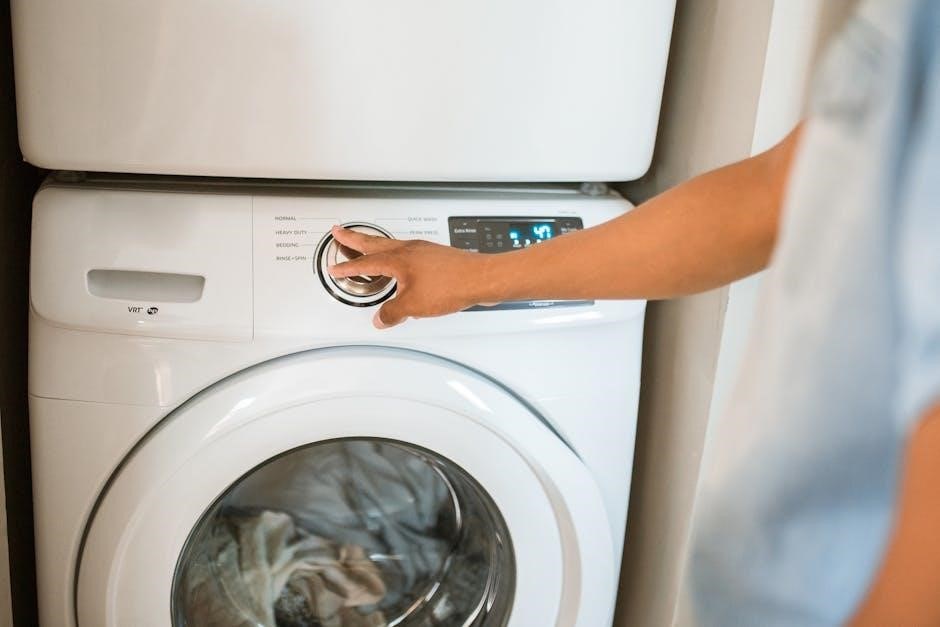
4.1. Dryer Not Turning On
If your Whirlpool dryer fails to turn on, start by checking the power supply. Ensure the dryer is properly plugged into a functioning outlet and that the circuit breaker or fuse hasn’t tripped. Verify that the dryer door is closed securely, as an open door can prevent operation. Check for any blockages in the venting system, as restricted airflow may trigger a safety shutdown. Additionally, inspect the power cord for damage and ensure all connections are secure. If the issue persists, consult the troubleshooting section of your manual or contact Whirlpool support for further assistance. Always prioritize safety by unplugging the dryer before performing any internal repairs.
4.2. Dryer Not Heating
If your Whirlpool dryer is not heating, there are several potential causes to investigate. First, ensure the dryer is set to a heat cycle, as some settings may run without heat. Check the power supply to confirm it’s receiving the correct voltage. Inspect the venting system for blockages, as poor airflow can prevent proper heating; Additionally, check the heating element and thermal sensors for damage or malfunction. Refer to your manual for diagnostic codes or fault indicators. Cleaning the lint filter and ensuring proper installation of venting components can also resolve the issue. If the problem persists, consult the troubleshooting guide or contact a professional for assistance. Always unplug the dryer before attempting internal repairs to ensure safety.
4.3. Strange Noises or Vibrations
Strange noises or vibrations in your Whirlpool dryer can indicate various issues. Common causes include loose objects inside the drum, worn-out drum rollers, or a malfunctioning belt. If the dryer produces a grinding or scraping sound, it may signal worn drum rollers or a failing motor bearing. Vibrations could also result from an imbalanced dryer or uneven installation. To address this, check for foreign objects, inspect the drum rollers for wear, and ensure the dryer is level. If noises persist, consult the manual for diagnostic guidance or consider professional assistance. Always prioritize safety by unplugging the dryer before performing internal inspections or repairs. Regular maintenance, such as cleaning the lint filter, can also help reduce unusual noises and vibrations.
4.4. Issues with Drying Time
If your Whirlpool dryer is taking longer than usual to dry clothes, it may indicate a problem with airflow, heat production, or sensor functionality. Clogged vents, a blocked lint filter, or a malfunctioning heating element can restrict proper drying. Additionally, faulty moisture sensors might prevent the dryer from detecting when clothes are dry, leading to extended cycles. To resolve this, ensure all vents are clear, check the heating element for damage, and verify sensor operation. Refer to the troubleshooting section for detailed diagnostic steps. If issues persist, consult a professional technician to restore your dryer’s efficiency and ensure optimal performance. Regular maintenance, such as cleaning the venting system, can help prevent prolonged drying times.
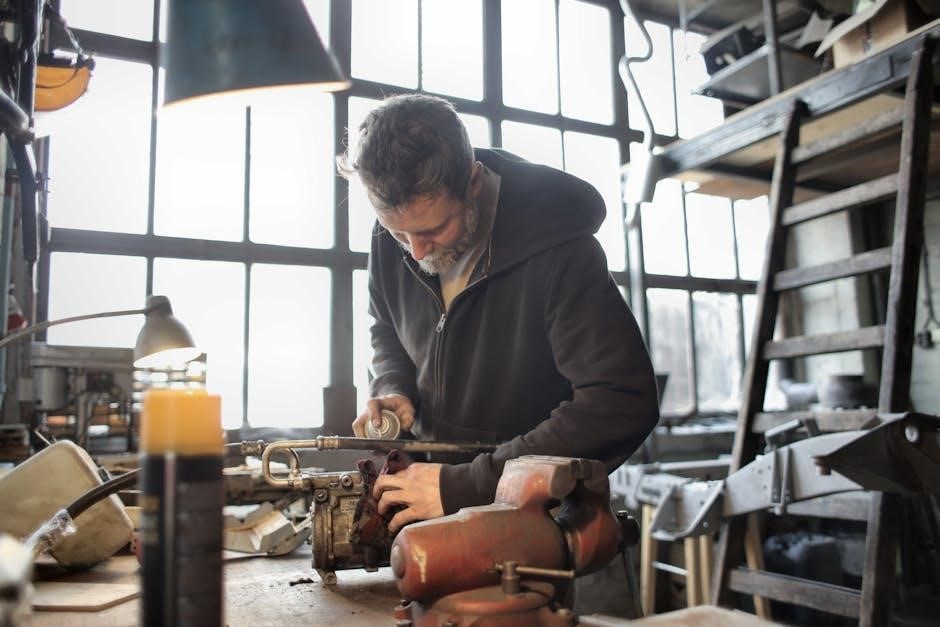
Step-by-Step Repair Guide
This section provides a detailed, sequential approach to repairing your Whirlpool dryer, covering disassembly, identifying faulty components, replacing parts, and reassembling the unit safely and efficiently. Always consult the manual for specific instructions to ensure proper repair and functionality.
5.1. Disassembling the Dryer
Before disassembling your Whirlpool dryer, ensure the power is disconnected for safety. Start by removing the top panel using a screwdriver, then take out the screws holding the back panel in place. Gently pry the panels off to access internal components. Next, disconnect the control panel by removing the mounting screws and carefully pulling it away from the dryer. This will expose the drum and other essential parts. Use a Torx driver to remove the drum’s retaining screws and slide it out for inspection. Keep all removed screws and parts organized to avoid losing them. Always refer to the manual for specific disassembly steps tailored to your dryer model.
5.2. Identifying Faulty Components
Identifying faulty components in your Whirlpool dryer requires a systematic approach. Start with a visual inspection of the belt, pulleys, and drum for signs of wear, cracks, or burn marks. Check the heating element for damage or rust, and ensure all electrical connections are secure and free from corrosion. If the dryer is noisy, inspect the drum bearings, rollers, and motor for excessive wear. Use a multimeter to test the continuity of sensors, thermostats, and fuses. Refer to the manual’s troubleshooting guide to match symptoms with potential component failures. Always prioritize safety by grounding yourself and using proper diagnostic tools to avoid further damage or injury.
5.3. Replacing Damaged Parts
Replacing damaged parts in your Whirlpool dryer is crucial for restoring functionality. Start by disconnecting the power supply and ensuring the dryer is cool. Use the manual to locate the faulty component, such as the belt, heating element, or thermostat. Remove the damaged part carefully, taking note of its connections. Install the new part by aligning it properly and securing it with the correct fasteners. For electrical components, use a multimeter to ensure proper connections. Refer to the manual for torque specifications and wiring diagrams. Always replace parts with Whirlpool-approved components to maintain safety and performance. Double-check all connections before reassembling the dryer to ensure everything functions correctly.
5.4. Reassembling the Dryer
Reassembling your Whirlpool dryer requires careful attention to detail to ensure proper functionality. Start by reversing the disassembly process, beginning with the drum and internal components. Align the panels and secure them with the original screws or fasteners. Reconnect electrical connectors, ensuring they are firmly attached to avoid loose connections. Reinstall the belt and pulleys, making sure they are properly aligned for smooth operation. Once all components are in place, close the dryer’s exterior panels and tighten all fasteners securely. Finally, plug in the dryer and perform a test cycle to verify that all functions are working correctly. Always refer to the manual for specific reassembly instructions to guarantee safety and efficiency.

Maintenance Tips to Prevent Future Issues
Regular maintenance keeps your Whirlpool dryer efficient and safe. Clean the lint filter after use, check vents for blockages, and schedule professional checks every six months to prevent issues and extend lifespan.
- Clean the lint filter after each use to improve efficiency and reduce fire hazards.
- Inspect and clean venting systems regularly to ensure proper airflow and prevent blockages.
- Schedule professional maintenance every six months to identify and address potential issues early.
6.1. Cleaning the Lint Filter
Cleaning the lint filter is essential for maintaining your Whirlpool dryer’s efficiency and safety. Remove the filter after each use and brush off lint with a soft brush or vacuum. Regular cleaning prevents lint buildup, which can cause fires or reduce performance. Ensure the filter is completely dry before reinstalling. For stubborn residue, gently wash with mild soap and let air dry. Check and clean the filter housing as well to ensure proper airflow. This simple step significantly improves drying time and energy consumption. Always refer to your manual for specific instructions tailored to your model. Cleaning the lint filter is a quick, easy task that plays a crucial role in maintaining your dryer’s optimal function and safety.
6.2. Checking and Cleaning Venting Systems
Regularly inspecting and cleaning your Whirlpool dryer’s venting system is crucial for optimal performance and safety. Over time, lint and debris can accumulate in the vents, reducing airflow and increasing the risk of fires. Start by detaching the vent from the dryer and exterior wall. Use a vacuum cleaner or flexible brush to remove lint and obstructions. Ensure all connections are secure and free from damage. Check the exterior vent for blockages, such as nests or debris, and clean it thoroughly. Properly maintained venting systems improve drying efficiency, reduce energy consumption, and prevent potential hazards. Schedule this maintenance every 3-6 months or after heavy use. Refer to your manual for specific guidance tailored to your dryer model.
6.3. Scheduling Regular Maintenance
Regular maintenance is essential to ensure your Whirlpool dryer operates efficiently and safely. Create a maintenance schedule to perform routine checks every 3-6 months. Start by cleaning the lint filter after each use and inspecting the venting system for blockages. Check the dryer’s belts and rollers for wear and tear, replacing them if necessary; Ensure all connections are secure and verify that the dryer is properly installed and leveled. Additionally, review the user manual for model-specific maintenance recommendations. By following these steps, you can prevent breakdowns, improve performance, and extend the lifespan of your dryer. Consistent upkeep also helps maintain energy efficiency and safety standards. Make maintenance a priority to enjoy reliable service from your appliance.

Warranty and Support Information
This section provides details on understanding your Whirlpool dryer’s warranty, including coverage terms and duration. It also outlines how to contact Whirlpool support for assistance and locate authorized service centers for professional help.
7.1. Understanding Your Warranty
Understanding your Whirlpool dryer’s warranty is crucial for ensuring coverage and protection. Typically, warranties vary by model and region, offering parts and labor coverage for specific durations. Review the terms to identify covered components, such as the motor or heating elements, and note any conditions that may void the warranty, like unauthorized repairs. Additionally, some warranties may extend beyond the standard period for certain parts, providing long-term security. Always refer to the official documentation or contact Whirlpool support for precise details tailored to your appliance. This ensures you maximize the benefits and avoid unforeseen repair costs. Proper understanding helps maintain your dryer’s performance and longevity.
7.2. Contacting Whirlpool Support
For assistance with your Whirlpool dryer, contacting customer support is straightforward. Visit the official Whirlpool website and navigate to the “Support” section, where you can access live chat, email, or phone options. Many regions offer 24/7 customer service for urgent inquiries. Additionally, the website provides resources like FAQs, troubleshooting guides, and repair scheduling. When reaching out, have your appliance’s model number and serial number ready for faster assistance. Whirlpool support can help with warranty claims, technical issues, or locating authorized service centers. Ensure to use official channels to avoid unauthorized third-party services. This direct access ensures reliable solutions for maintaining your dryer’s performance and addressing any concerns promptly.
7.3. Finding Authorized Service Centers
To locate an authorized Whirlpool service center, visit the official Whirlpool website and use the “Service Center Locator” tool. Enter your location and appliance model to find nearby centers. These centers employ trained technicians who use genuine Whirlpool parts, ensuring repairs meet manufacturer standards; Authorized centers also handle warranty repairs and provide reliable diagnostics. Avoid unauthorized services to maintain your dryer’s warranty and performance. For accurate results, verify the center’s authorization status on Whirlpool’s official website before scheduling a service. This ensures quality repairs and peace of mind, keeping your appliance in optimal condition. Always prioritize authorized centers for trusted and efficient service.
Additional Resources
Access online communities, manufacturer contact information, and downloadable PDFs for further assistance. Utilize troubleshooting guides and service manuals for comprehensive support beyond this manual.
8.1. Downloading the Latest Manual
The Whirlpool Dryer Repair Manual PDF is readily available for download from various sources. Visit Whirlpool’s official website or reputable platforms like ManualsLib or RepairClinic to access the latest version. Ensure you search for your specific dryer model to get the most accurate and up-to-date information. Once on the site, navigate to the support or downloads section, enter your model number, and follow the prompts to download the PDF. This manual will provide detailed troubleshooting guides, maintenance tips, and repair instructions tailored to your appliance. Always verify the source to ensure the manual is genuine and compatible with your dryer model for optimal results.
8.2. Online Communities for Repair Help
Online communities are invaluable resources for Whirlpool dryer repair. Platforms like RepairClinic, ManualsLib, and appliance repair forums offer extensive support. These communities provide access to user forums, repair guides, and troubleshooting tips from experienced technicians and DIY enthusiasts. You can share specific issues, receive tailored advice, and gain insights from others who have faced similar challenges. Many communities also host downloadable resources, including manuals and diagrams, to aid in your repair journey. Engaging with these groups can enhance your understanding and confidence in resolving dryer issues effectively. They often include real-time support and updates, ensuring you stay informed about the latest repair techniques and solutions.
8.3. Manufacturer Contact Information
For direct assistance, Whirlpool provides comprehensive contact information in their manuals and on their official website. Visit Whirlpool’s customer service page to find support options, including phone numbers, email addresses, and live chat. The manual also lists authorized service centers where you can seek professional help. Additionally, Whirlpool’s website offers a “Contact Us” section with detailed information for different regions. You can also find warranty details and repair support through these channels. Reaching out to the manufacturer ensures you receive authentic parts and verified repair methods, guaranteeing safety and efficiency. Always refer to the official sources for the most reliable assistance with your Whirlpool dryer repair needs.
With this manual, you’ve mastered Whirlpool dryer repair skills. Regular maintenance and safe practices ensure longevity. Happy repairing and enjoy efficient appliance performance always!
9.1. Final Tips for Successful Repair
Always follow the manual’s instructions precisely to avoid further damage. Ensure all safety precautions are in place before starting any repair. Use genuine spare parts for optimal performance. Keep your workspace clean and well-lit to minimize errors. Double-check connections and components after reassembly. Regular maintenance, such as cleaning the lint filter and venting system, prevents future issues. If unsure about a step, consult the troubleshooting guide or contact Whirlpool support. Remember, patience and attention to detail are key to a successful repair. By adhering to these tips, you’ll extend the lifespan of your dryer and ensure reliable operation. Happy repairing!
9.2. Encouraging DIY Repair
Embracing DIY repair empowers you to take control of maintaining your Whirlpool dryer, saving time and money. With the detailed guide provided, you can confidently troubleshoot and fix common issues. The manual is designed to be user-friendly, offering clear instructions for both beginners and experienced users. By following the step-by-step repair processes, you’ll gain hands-on experience and improve your technical skills. DIY repair also allows you to identify and address problems early, preventing costly damages. Remember, safety is paramount, so always adhere to the safety precautions outlined in the manual. With patience and the right tools, you’ll successfully repair your dryer and enjoy the satisfaction of a job well done. DIY repair fosters independence and confidence, making it a valuable skill for homeowners.
9.3. Importance of Proper Maintenance
Proper maintenance is crucial for extending the lifespan of your Whirlpool dryer and ensuring optimal performance. Regular upkeep prevents minor issues from escalating into major repairs, saving you time and money. By following the maintenance tips outlined in this manual, such as cleaning the lint filter and checking venting systems, you can significantly reduce the risk of breakdowns. Consistent care also enhances safety, reducing fire hazards and ensuring efficient operation. A well-maintained dryer operates more efficiently, lowering energy consumption and prolonging its durability. Make maintenance a routine practice to enjoy uninterrupted service and reliability from your appliance. Proper care not only safeguards your investment but also ensures your dryer continues to function at its best for years to come.